How to create an account
To create an account you should follow the three next steps
-
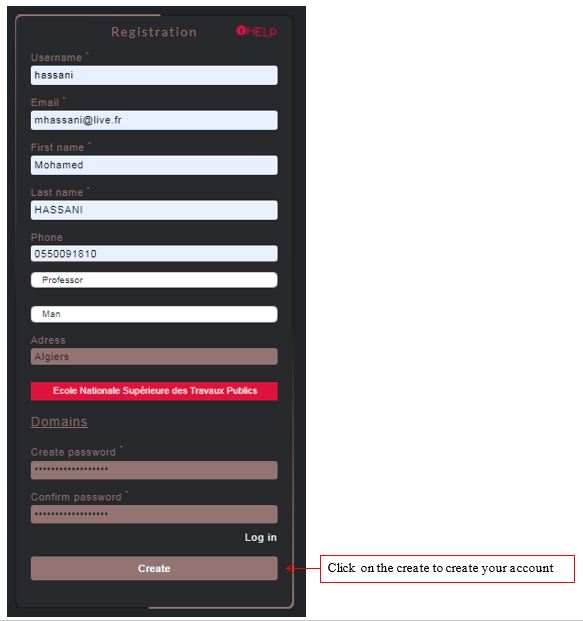
First step : Fill the required fields with appropriate information ( Show details)
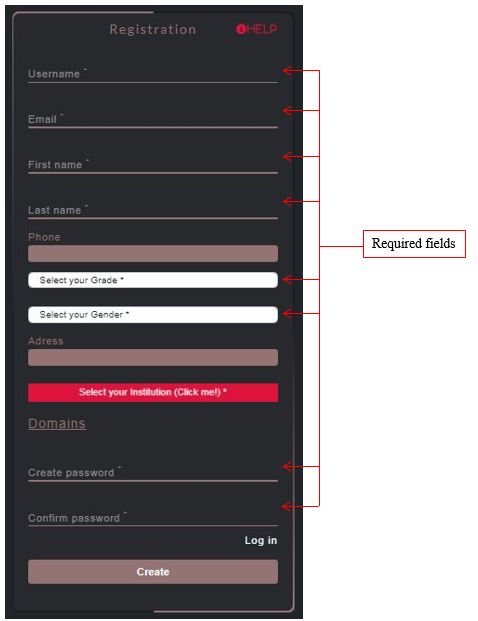
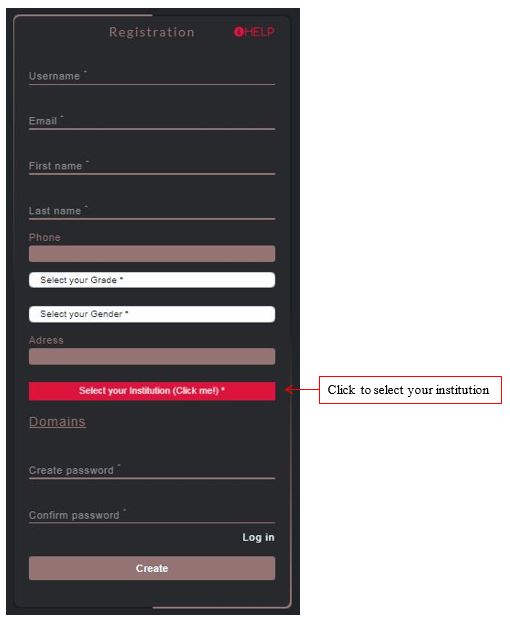
In this step you should fill all the fields presented by asterix (*) (see figure below) with appropriate information
-
Second step : Sellect your institution/affiliation from the list or create a new one ( Show details)
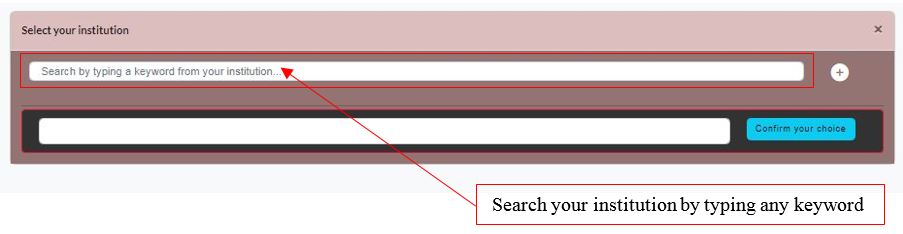
Click on the button "Select your institution (Click me!)" (See figure below) to choose your institution/affiliation. This field is required.
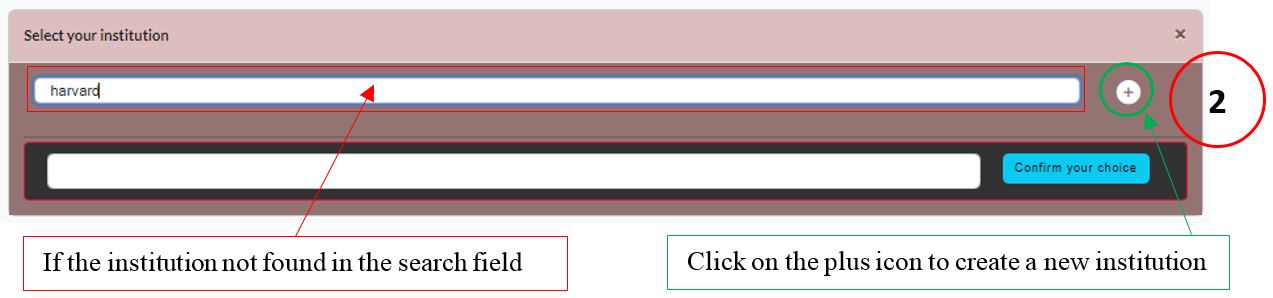
One's the "Select your institution (Click me!)" button is clicked, the window below appears (See figure below). You can now search by typing any keyword of your institution.
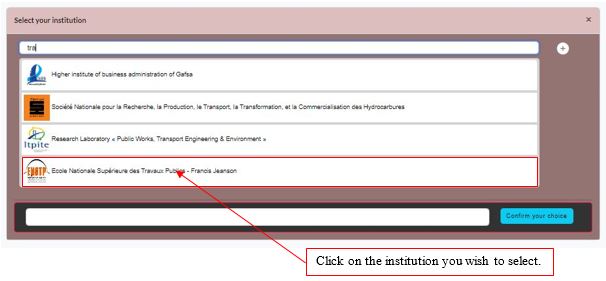
Clicking on any keyword will trigger an instant search for institutions. Then, use the dropdown list to select your institution (See figure below).
Once completed, the selected insitution's name appear in the field outlined in green (See figure below). Then click on the "confirm your choice" button.

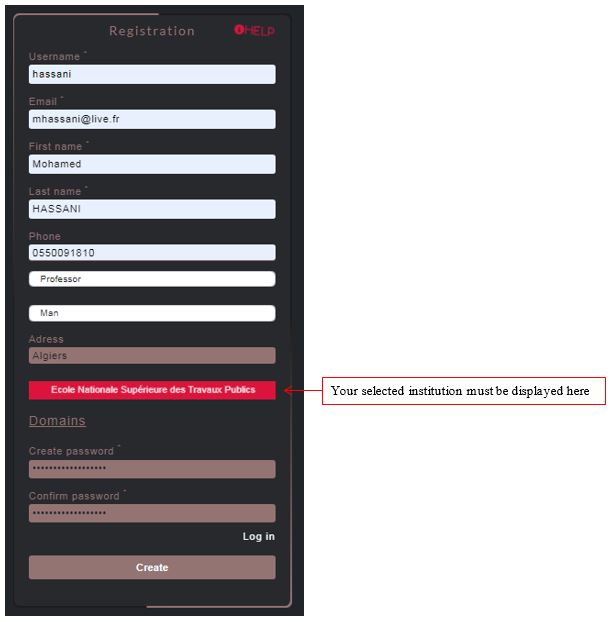
After that, you will be returned to the registration page, and the name of the selected institution should be displayed (See figure below).
-
Third step: Click on the "Create" button ( Show details)
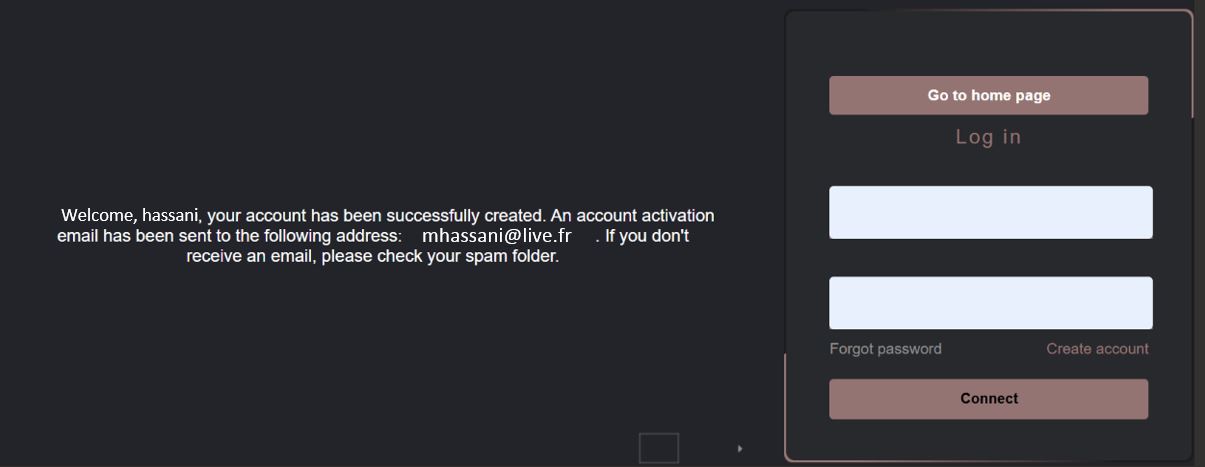
In this step you should to click on the "Create" button.
One it's done, you will be redirected to the login page, and a notification will appear informing you that an account activation link has been sent to your email (See figure below).
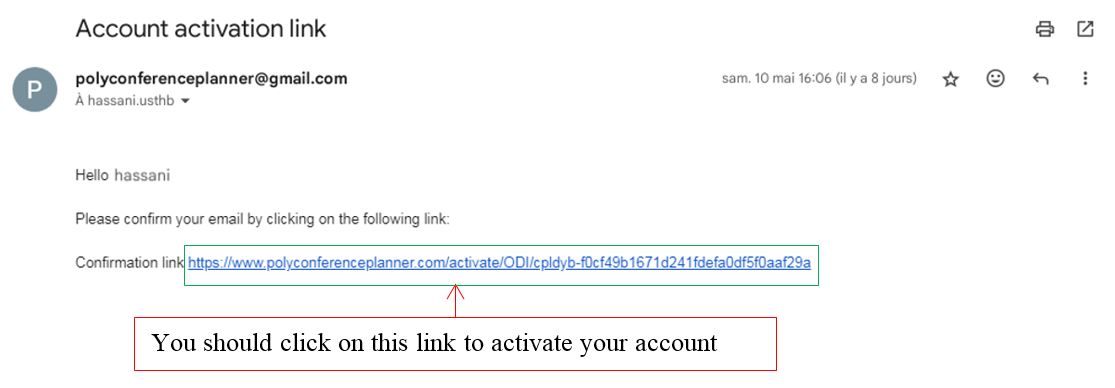
Please check your inbox and click the link to activate your account (See figure below). If you do not receive the email, be sure to check your spam folder.
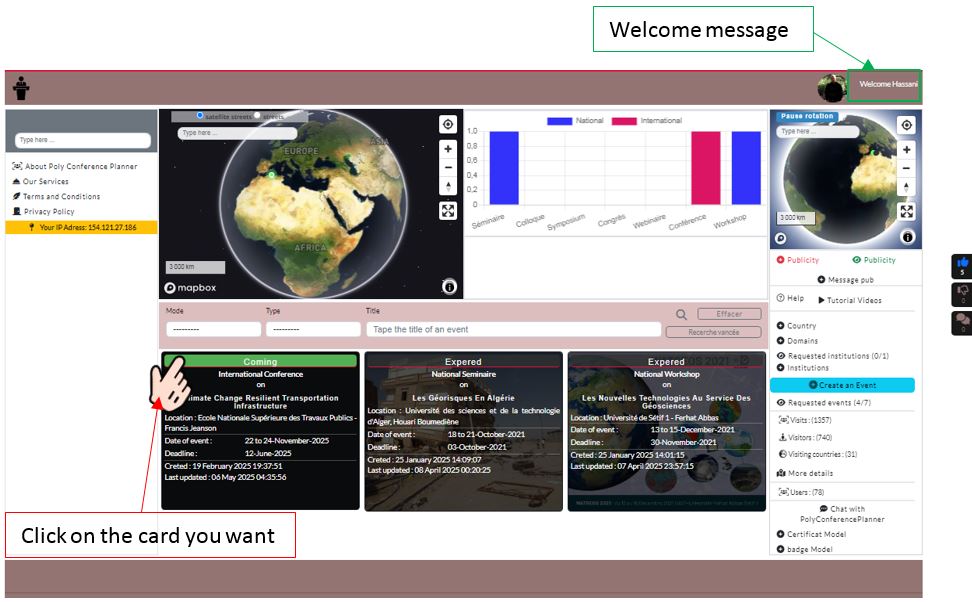
Once the activation link is clicked, you will be redirected to the PolyConferencePlanner homepage (See figure below). Your account is now successfully activated, and you will see the welcome message in the top right 'Ex. Welcome Hassani' (outlined in green). From the PolyConferencePlanner homepge, you can access any scientific event by simply clicking on the corresponding card (See figure below).
That's All
If your institution is not found in step two, what should you do?
-
How to create a new institution ( Show details)
If your institution is not found in the step two, you sould create one. To ceate a new institution, Please follow these steps: (see figure below)
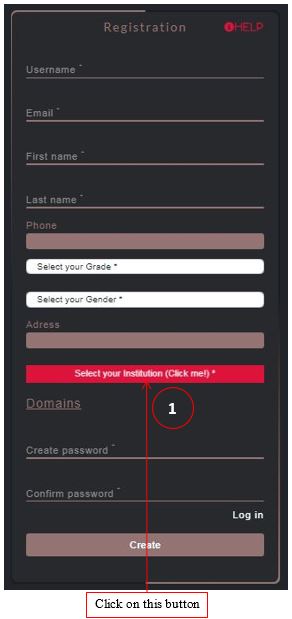
1). Click on the" Select your institution" button (see figure 1 below).
2). Click on the icon at the top right (see figure 2 below).
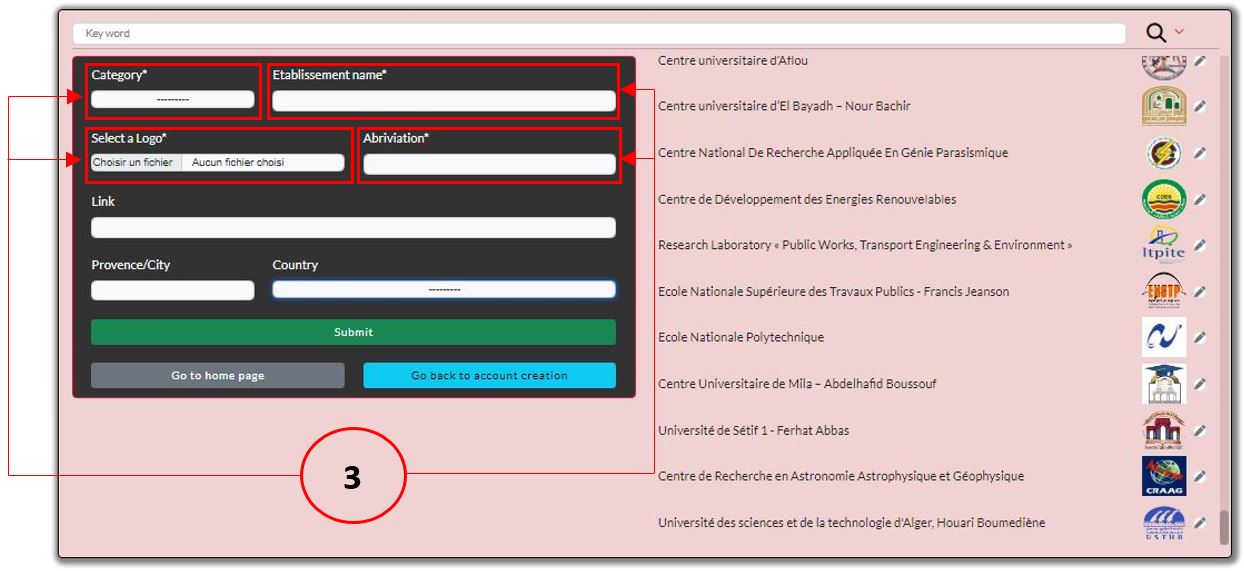
3). Fill all the required fields outlined in red (see figure 3 below). The logo file support only jpg, jpeg and png format.
4). Redo the three steps to create an account mentionted above.
5). That'S All